Categories: Photograph

Exploring How Light Painting Works in Photography

Light painting is a fascinating and creative technique in photography that combines long exposure times with the movement of light sources to create stunning visual effects. Whether you’re a professional photographer or an enthusiastic amateur, understanding how light painting works can open up new avenues for artistic expression.

Light painting photography involves manipulating light during a long exposure to “paint” in the frame. This can be done by moving the light source or by moving the camera itself. The possibilities are nearly endless, ranging from drawing intricate patterns to highlighting specific parts of a scene. But how does light painting work in practice, and what makes it such a unique art form? Let’s explore this concept further.

What is Light Painting?
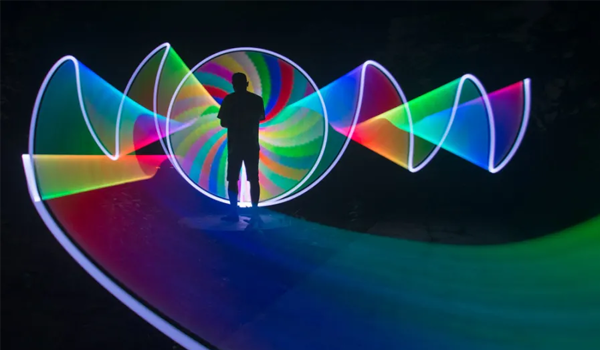
What is Light Painting

Light painting is a technique where photographers use a moving light source to “paint” an image while the camera’s shutter is left open for an extended period. The resulting photographs can range from abstract streaks of light to more detailed, intentional designs that tell a story or highlight a subject in a unique way.

In this technique, the photographer typically works in a dark environment and uses various light sources—such as LED lights, flashlights, or even sparklers—to create light trails. The camera captures these trails as the light moves across the scene, resulting in an image that combines the light patterns with any other elements in the frame.

Defining Light Painting in Photography

Light painting in photography is defined by the use of long exposure settings on a camera to capture the movement of light sources within the frame. This method allows photographers to create images where the light itself becomes a dynamic element, shaping the final photograph in ways that static light cannot achieve.

For light painting to work effectively, the photographer must have precise control over the camera settings, particularly the shutter speed. A slow shutter speed—often several seconds to minutes long—gives the photographer ample time to move the light source through the scene, creating the desired effect. Additionally, tools like tripods are essential to prevent unwanted camera shake, ensuring the only movement in the shot is that of the light source itself.

History and Evolution of Light Painting

The history of light painting dates back to the early 20th century, with the technique evolving alongside advancements in photography. One of the pioneers of light painting was Gjon Mili, a photographer who, in collaboration with Harold Edgerton from MIT, used stroboscopic lights to capture motion in a single frame during the 1930s and 1940s. This early work laid the foundation for modern light painting techniques.

Perhaps the most famous example of light painting is the collaboration between Mili and Pablo Picasso in 1949, where Picasso used a small light to “draw” in the air while Mili captured the movements with his camera. These images, known as Picasso’s “light drawings,” have become iconic representations of the art form.

Over the decades, light painting has continued to evolve, with photographers experimenting with different light sources, techniques, and tools to push the boundaries of this artistic medium. Today, light painting is a widely recognized and practiced form of photography, celebrated for its blend of technical skill and creative expression.

Essential Equipment for Light Painting
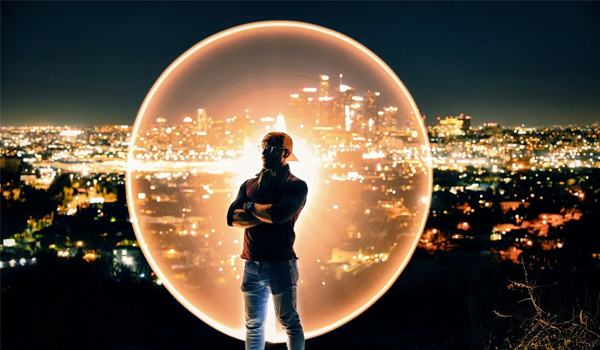
Essential Equipment for Light Painting

To achieve stunning light painting results, having the right equipment is crucial. While creativity and technique play significant roles, the tools you use can dramatically influence the outcome of your light painting photography. From choosing the appropriate camera and lenses to selecting the best light sources, each piece of gear serves a specific purpose that helps bring your vision to life. Additionally, a stable tripod is indispensable for ensuring that your long exposure shots are sharp and clear, allowing the light patterns to stand out without any motion blur from unintended camera movement.

Choosing the Right Camera and Lenses

When it comes to light painting, not just any camera will do. Ideally, you need a camera that allows for manual control over shutter speed, aperture, and ISO settings. DSLR and mirrorless cameras are preferred because they offer the flexibility needed for long exposure photography, which is essential for light painting to work effectively.

A camera with a full-frame sensor is advantageous because it can capture more light and detail, which is particularly useful in low-light conditions where light painting is typically done. The lenses you choose should also allow for manual focus and have a wide aperture (such as f/2.8 or lower) to let in as much light as possible. A wide-angle lens is often preferred for capturing large scenes, while a prime lens can be ideal for more focused, detailed work​​​​.

Must-Have Light Sources for Creative Effects

The light sources you use in light painting are just as important as your camera setup. Various tools can be employed to create different effects, and understanding how light painting works with these sources can help you achieve the desired outcome.

  1. LED Lights: These are versatile and come in various colors and sizes. LED wands and strips are popular for creating sweeping light patterns.
  2. Flashlights: A basic but effective tool, flashlights can be used to draw or highlight specific areas in your scene. Diffusing the light can also soften its effect.
  3. Sparklers: These are perfect for creating dramatic, fiery trails and are often used in outdoor light painting.
  4. Light Brushes: These are specialized tools designed for light painting, offering a range of attachments to create different textures and effects in your photos​​​​.

The Importance of a Stable Tripod

A stable tripod is perhaps the most essential piece of equipment for light painting. Since light painting works by using long exposure times, any movement of the camera during the exposure can ruin the shot by introducing unwanted blur. A good tripod ensures that the camera remains completely still, allowing the light trails to appear sharp and defined.

When selecting a tripod, look for one that is sturdy and can handle the weight of your camera setup. Features like adjustable legs, a secure ball head, and even weight hooks (for added stability) can make a significant difference in maintaining camera stability during long exposures. For added security, using a remote shutter release or a timer can prevent camera shake caused by pressing the shutter button​​​​.

By equipping yourself with the right gear, you can master the art of light painting and produce images that truly stand out. Each piece of equipment plays a role in how well light painting works, helping you to capture the beauty and complexity of light in motion.

Setting Up Your Camera for Light Painting
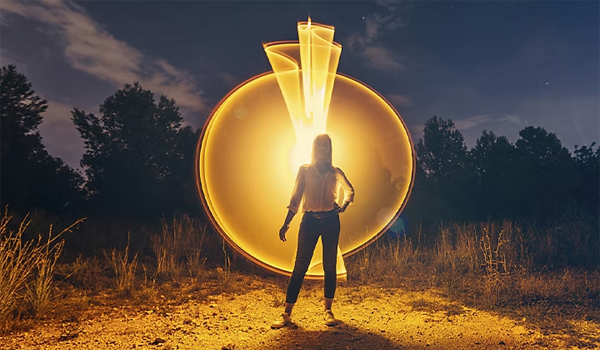
Setting Up Your Camera for Light Painting

To capture the mesmerizing effects of light painting, setting up your camera correctly is essential. The success of your light painting photography hinges not only on the tools you use but also on how well you configure your camera settings. Understanding how to balance shutter speed, ISO, and aperture will significantly influence the quality of your images. Additionally, knowing when to use manual focus over autofocus, especially in low-light conditions, and utilizing the bulb mode for extended exposures are key techniques that can elevate your light painting shots to the next level.

Understanding Shutter Speed, ISO, and Aperture

In light painting, the interplay between shutter speed, ISO, and aperture is crucial. Shutter speed controls the length of time your camera’s sensor is exposed to light. For light painting, slow shutter speeds—typically ranging from 10 seconds to several minutes—allow the camera to capture the full movement of the light source, creating the desired trails and patterns. The slower the shutter speed, the more light the camera captures, which is essential for light painting to work effectively​​.

ISO settings determine the sensitivity of your camera’s sensor to light. A lower ISO (100-400) is generally recommended to reduce noise and ensure a clean, smooth image, especially when working in dark environments typical of light painting sessions​​.

Aperture, indicated by f-stops, controls the amount of light entering the camera. A smaller aperture (larger f-number like f/8 or f/16) is often used to increase depth of field and reduce the impact of ambient light, allowing the light trails to stand out more prominently against a darker background​​​​.

Manual Focus vs Autofocus in Low Light

Focusing in low light can be challenging, and this is where understanding the difference between manual focus and autofocus becomes important. Autofocus systems may struggle in the dark, leading to blurred images as the camera hunts for something to lock onto. To avoid this, manual focus is typically preferred in light painting. By manually setting your focus point, you ensure that your subject or the area where the light painting will occur remains sharp throughout the exposure​​.

A useful tip is to pre-focus your lens on a specific point in the scene while there’s still some light available or by using a flashlight to illuminate the focus point temporarily. Once focused, switch the lens to manual mode to lock the focus for the entire session​​.

Using the Bulb Mode for Extended Exposures

Bulb mode is an essential feature for light painting, as it allows the photographer to control the length of the exposure manually. Unlike standard shutter speed settings, which have a maximum time limit (usually 30 seconds), bulb mode keeps the shutter open for as long as the shutter button is held down. This is particularly useful for light painting scenes that require extended exposure times beyond what your camera typically offers​​.

When using bulb mode, a remote shutter release is highly recommended to prevent camera shake during the long exposure. This setup ensures that the camera remains stable, capturing every detail of the light movement without any unintended blur​​.

Setting up your camera with these considerations in mind ensures that light painting works as intended, giving you the control needed to create visually striking images that capture the beauty and complexity of light in motion.

Basic Techniques in Light Painting

Mastering the basics of light painting involves understanding and applying fundamental techniques that form the foundation of this art form. Whether you’re a beginner or looking to refine your skills, focusing on simple yet effective methods is crucial for creating impactful images. Starting with basic strokes, experimenting with different angles and movements, and learning how to manage exposure will help you gain confidence and control in your light painting endeavors. By honing these techniques, you’ll ensure that your work reflects both creativity and technical precision, making the most out of how light painting works.

Simple Strokes: The Foundation of Light Painting
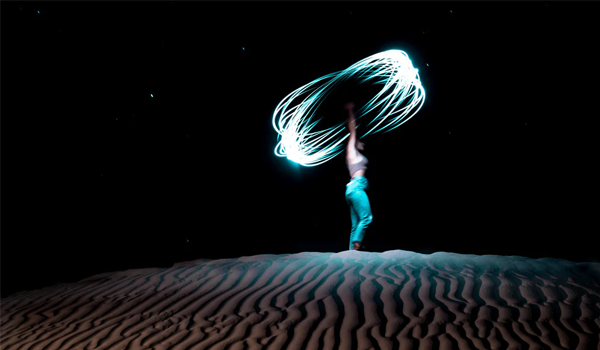
Simple Strokes - The Foundation of Light Painting

The simplest approach to light painting involves creating basic strokes with your light source. These strokes are the building blocks of more complex designs and patterns. To start, choose a light source such as a flashlight or an LED wand. With your camera set to a long exposure, move the light source in steady, deliberate motions to create lines, shapes, or even letters in the air.

For beginners, practicing straight lines, circles, and basic shapes helps build an understanding of how the light interacts with the camera’s sensor over time. These fundamental movements allow you to see the immediate effects of your actions, providing insight into how light painting works and how different speeds and distances from the camera affect the final image​​​​.

Experimenting with Different Angles and Movements

Once you’ve mastered the basics, experimenting with angles and movements can add depth and dimension to your light paintings. Changing the angle of your light source relative to the camera can create varying effects, from soft, diffused glows to sharp, intense lines. Try moving the light source closer or further from the camera to see how the light trails change in thickness and intensity.

You can also incorporate more dynamic movements, such as spirals, zigzags, or waves, to bring energy and flow to your compositions. Rotating the camera itself during the exposure, a technique known as camera rotation, can produce intriguing abstract patterns that further explore the potential of light painting​​.

How to Avoid Overexposure and Hot Spots

One of the challenges in light painting is managing exposure to avoid overexposed areas, known as “hot spots,” where the light is too intense and details are lost. Overexposure occurs when the light source is too bright, too close to the camera, or held in one spot for too long. To prevent this, consider the following techniques:

  1. Adjust the Light Source: Use dimmer lights or diffuse your light source with a filter to reduce its intensity.
  2. Move the Light Quickly: Keep the light moving to avoid concentrated brightness in one area.
  3. Control the Exposure Settings: Lower the ISO and use a smaller aperture to limit the amount of light hitting the sensor. These adjustments can help maintain detail and texture in your light painting​​​​.

By paying attention to these details, you can create balanced light paintings where the light trails enhance the image without overpowering it, demonstrating a thorough understanding of how light painting works in practice.

Advanced Light Painting Techniques

Once you’ve mastered the basics of light painting, exploring advanced techniques can take your creative photography to the next level. These techniques allow you to push the boundaries of what can be achieved with light and long exposure, adding complexity and depth to your images. From creating dramatic silhouettes and intricate light trails to using multiple light sources and reflective surfaces, these methods offer endless possibilities for artistic expression. Understanding how light painting works at an advanced level will help you craft images that are not only visually stunning but also rich in detail and creativity.

Creating Silhouettes and Light Trails

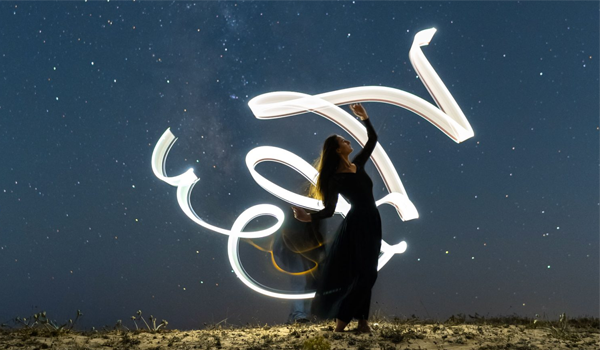
One of the most effective advanced techniques in light painting is combining silhouettes with light trails. This method involves placing a subject—such as a person or object—between the camera and the light source. The subject blocks the light, creating a dark outline or silhouette against the vibrant trails of light that surround them. This contrast can add drama and focus to your image, making the silhouette the centerpiece while the light trails enhance the overall composition.

To achieve this effect, position your subject close to the camera and light the background with your chosen light source. As you move the light behind the subject, be careful to avoid directly illuminating them to maintain the silhouette. Experimenting with different angles and movements can create a variety of shapes and patterns, highlighting how light painting works in creating both static and dynamic elements within the same frame​​​​.

Using Multiple Light Sources for Complex Designs

Incorporating multiple light sources into your light painting allows for more intricate and layered designs. Each light source can be used to create different colors, textures, and patterns within the same image. For instance, you can use a combination of LED wands, flashlights, and even lasers to produce overlapping light trails that interact with each other in complex ways.

This technique requires careful planning and control over each light source’s movement and timing. It’s essential to practice with each light source individually before combining them, to understand how they affect the exposure and composition. By layering different light effects, you can create images that are rich in detail and visually compelling, demonstrating a deep understanding of how light painting works in more sophisticated scenarios​​​​.

Integrating Reflective Surfaces for Dynamic Effects

Using reflective surfaces in light painting can add a dynamic and surreal quality to your images. Mirrors, glass, water, and metallic objects can reflect and scatter light in unexpected ways, creating additional light trails, doubling patterns, or introducing new textures into your composition.

To use this technique, position the reflective surface within your scene where it can catch and reflect the light source. For example, placing a mirror in the foreground can reflect light trails from behind, creating the illusion of additional light sources. Adjusting the angle of the reflective surface allows you to control the direction and intensity of the reflections, adding another layer of complexity to your light painting.

This technique not only enhances the visual appeal of your work but also challenges your understanding of how light painting works with different materials, leading to more innovative and creative outcomes​​​​.

Conclusion

Light painting is a versatile and captivating technique that allows photographers to blend creativity with technical precision. Whether you’re creating simple light trails or experimenting with complex designs, understanding how light painting works can open up a world of artistic possibilities. By mastering the fundamentals and exploring advanced techniques, you can push the boundaries of your photography and create images that are not only visually stunning but also deeply engaging.

As you continue to practice and refine your skills, remember that light painting is as much about experimentation as it is about precision. Every new tool, angle, and setting can lead to unexpected and exciting results, making the journey of learning how light painting works a truly rewarding experience. With patience and creativity, you can develop a unique style that reflects your artistic vision and passion for light painting.
Categories: Photograph

Why the Most Difficult Studio Shot in Photography Matters

Photography in a studio environment offers photographers complete control over the scene, allowing them to manipulate every aspect to achieve the perfect shot. However, with this control comes complexity, and some studio shots are notoriously difficult to execute. The most difficult studio shot in photography often involves managing intricate lighting setups, working within tight spaces, and coordinating complex equipment—all while ensuring that the creative vision is flawlessly captured. In this article, we will explore the challenges of executing such demanding shots and provide insights into overcoming them.

Understanding the Complexity of Studio Photography

Understanding the Complexity of Studio Photography

Studio photography requires not just technical proficiency but also a deep understanding of how various elements interact. Unlike outdoor photography, where natural light and the environment play a significant role, studio photography is entirely crafted by the photographer. This control can be both a blessing and a curse, as even minor miscalculations can lead to significant issues. The most difficult studio shot in photography often pushes the boundaries of a photographer’s skill set, requiring meticulous planning and execution to ensure that all elements—from lighting to composition—come together seamlessly.

The Importance of Lighting Control in Studio Photography

Lighting is arguably the most critical aspect of studio photography and also the most challenging. The most difficult studio shot in photography often involves complex lighting setups that must be carefully managed to avoid unwanted shadows, highlights, or color imbalances. Photographers must decide between using continuous lighting or strobe lights, each offering different advantages and challenges. Continuous lighting, for example, allows photographers to see how light interacts with the subject in real-time but may not provide the intensity needed for certain shots. On the other hand, strobe lighting can freeze motion and offer more power but requires precise timing and coordination with the camera’s settings.

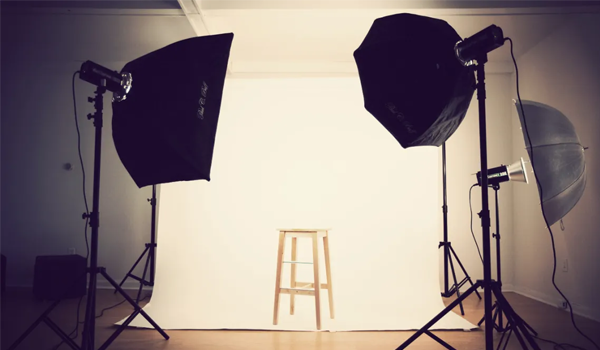
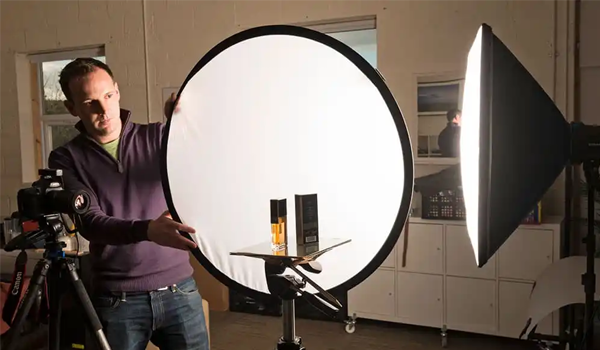
To master lighting in a difficult studio shot, photographers often use a combination of light modifiers such as softboxes, reflectors, and diffusers to control the light’s quality and direction. These tools help create the desired mood and tone, but their use requires a thorough understanding of how light behaves in a controlled environment. This level of control is what makes the most difficult studio shot in photography such a daunting task, as even slight miscalculations can lead to unsatisfactory results.

Managing Limited Space and Composition Challenges

Another significant challenge in the most difficult studio shot in photography is managing limited space. Studios often have confined areas, which can make it challenging to position lights, equipment, and the subject while still achieving the desired composition. Photographers must be adept at using the space creatively, often working with tight angles and close quarters. This can involve strategic placement of lights to avoid cluttered backgrounds or using wide-angle lenses to capture more of the scene without distorting the subject.

Moreover, composition in studio photography isn’t just about placing the subject within the frame—it’s about telling a story or conveying a particular emotion through careful arrangement of all visual elements. This is especially true for the most difficult studio shot in photography, where every element must be perfectly aligned to achieve the intended effect. The photographer must consider the relationship between the subject, the background, and the lighting to create a cohesive and compelling image.

Dealing with Complex Equipment Setups

The technical demands of the most difficult studio shot in photography often require the use of sophisticated equipment. This includes not only cameras and lenses but also a range of lighting gear, backdrops, and props that must be meticulously coordinated. For instance, using multiple light sources might require synchronized triggers, while controlling reflections might involve the use of polarizing filters or specific backdrop materials.

Managing all this equipment efficiently is a skill in itself. Photographers must ensure that everything is set up correctly before the shoot begins, as any technical issues could disrupt the entire session. This is why planning and preparation are crucial—understanding how to set up and use each piece of equipment can make the difference between a successful shoot and a failed one.

Key Challenges in Capturing the Most Difficult Studio Shots

Key Challenges in Capturing the Most Difficult Studio Shots

Studio photography, while offering complete control over the environment, presents a unique set of challenges that can be daunting even for seasoned professionals. Capturing the most difficult studio shot in photography requires a deep understanding of how to manage and manipulate every element of the shoot, from lighting to composition, while overcoming various technical obstacles. This section will explore the specific challenges that make certain studio shots particularly difficult and how photographers can navigate these hurdles to achieve stunning results.

Perfecting Low Light Studio Photography

Low light photography in a studio setting can be particularly challenging, as it requires precise control over the light sources to achieve the desired mood without introducing unwanted noise or losing detail. The most difficult studio shot in photography often involves working in low light conditions, where balancing the exposure is critical. Photographers must decide on the appropriate ISO settings, shutter speed, and aperture to capture sharp images without sacrificing quality.

One technique to enhance low light photography is the use of fast lenses, which allow more light to enter the camera, making it easier to achieve the correct exposure. Additionally, using external light sources such as softboxes or continuous lights can help illuminate the subject without overpowering the natural ambiance of the low light setup. Managing these elements effectively is essential to mastering the most difficult studio shot in photography when working in dimly lit environments.

Balancing Shadows and Highlights

In low light studio photography, achieving a balance between shadows and highlights is crucial. Too much contrast can lead to loss of detail in the shadows, while too little can result in a flat, uninteresting image. Photographers often use reflectors to bounce light into shadow areas or adjust the position of their key light to create a more even distribution of light across the subject. This careful management of light is what makes the most difficult studio shot in photography so demanding, as it requires both technical precision and an artistic eye.

Capturing Motion in a Controlled Environment

Photographing motion in a studio setting adds another layer of complexity to the most difficult studio shot in photography. Unlike outdoor environments where natural light and space allow for greater flexibility, studios require photographers to control every aspect of the motion, including the timing, lighting, and background. Capturing motion effectively often involves using specialized equipment like high-speed cameras and strobes to freeze action or create a sense of movement.

One common approach is to use a combination of continuous lighting and strobes to capture both the motion blur and the sharp details of a moving subject. This technique allows for creative expression while maintaining the controlled environment necessary for studio photography.

Techniques for Freezing and Blurring Motion

Freezing motion in a studio involves using fast shutter speeds and precise lighting setups. Strobe lights are particularly useful for this, as they can deliver a burst of light that freezes the subject in place, even in the midst of rapid movement. On the other hand, creating motion blur requires a slower shutter speed, which captures the movement over time, giving a dynamic and energetic feel to the image. Balancing these techniques within the constraints of a studio environment is what makes the most difficult studio shot in photography so intricate.

Managing Reflections and Glare in Product Photography

Product photography presents its own set of challenges, particularly when dealing with reflective surfaces such as glass, metal, or glossy finishes. The most difficult studio shot in photography often involves managing reflections and glare, which can distract from the product and reduce the overall quality of the image. Photographers need to carefully position their lights and use diffusers or polarizing filters to minimize unwanted reflections.

One effective technique is to use a light tent or box, which surrounds the product with diffused light, reducing harsh reflections and ensuring that the product’s features are highlighted without distraction. Additionally, adjusting the angle of the camera or using black cards to absorb unwanted light can help manage glare. Mastering these techniques is essential for creating high-quality product images that meet professional standards.

Overcoming Difficulties with Advanced Techniques

Overcoming Difficulties with Advanced Techniques

Mastering studio photography involves more than just understanding the basics; it requires a deep dive into advanced techniques that can help overcome the inherent difficulties of challenging shots. The most difficult studio shot in photography often demands innovative solutions and a thorough understanding of how to manipulate light, focus, and depth of field to achieve the desired result. This section explores advanced techniques that can elevate your studio photography and help you tackle even the most complex scenarios with confidence.

Using Advanced Lighting Techniques for Challenging Shots

Lighting is the cornerstone of any great photograph, and in studio photography, it becomes even more critical. For the most difficult studio shot in photography, mastering advanced lighting techniques is essential. This involves not only the placement and intensity of lights but also understanding how different lighting setups can dramatically alter the mood and quality of an image.

Understanding and Utilizing Rembrandt Lighting

Rembrandt lighting is a classic technique used in portrait photography to create dramatic and moody images. Named after the famous painter, this technique involves positioning the key light at approximately a 45-degree angle from the subject, slightly above eye level. The goal is to create a small triangle of light on the subject’s cheek on the shadowed side of the face. This technique adds depth and dimension, making it ideal for the most difficult studio shot in photography where drama and contrast are key.

To achieve Rembrandt lighting, photographers often use a single light source combined with a reflector or fill light to control the shadows. This setup requires precise positioning and an understanding of how light falls on the subject’s face, making it a challenging but rewarding technique for those looking to add a classical touch to their studio shots​​​​.

The Role of Diffusers and Reflectors

Diffusers and reflectors play a crucial role in managing light in a studio setting, especially when dealing with the most difficult studio shot in photography. Diffusers soften the light, reducing harsh shadows and creating a more flattering appearance on the subject. This is particularly useful in portrait photography, where soft, even lighting is often desired.

Reflectors, on the other hand, are used to bounce light back onto the subject, filling in shadows and adding highlights where needed. By strategically placing reflectors, photographers can control the light’s direction and intensity, making it easier to achieve a balanced exposure. These tools are indispensable in advanced lighting setups, helping to manage the complex interplay of light and shadow in a controlled studio environment​​​​.

The Art of Precision in Focus and Depth of Field

Achieving perfect focus and depth of field is another critical aspect of the most difficult studio shot in photography. These elements determine what part of the image is sharp and in focus, which can drastically alter the composition and impact of the final image.

Single Point Focus vs. Auto Focus Grid Systems

When it comes to focus, photographers often debate between using single point focus or auto focus grid systems. Single point focus allows the photographer to select a specific point in the frame that should be in sharp focus. This is particularly useful in studio photography, where precision is key, such as when focusing on the eyes in a portrait or a specific detail in a product shot. The most difficult studio shot in photography often requires this level of control to ensure that the most important element of the image is perfectly sharp.

Auto focus grid systems, while more automated, can be less precise. They often select multiple focus points across the frame, which might not align with the photographer’s creative intent. However, these systems can be useful in scenarios where the subject is moving or when working with larger depth of field, such as in group portraits. Understanding when to use each focus method is crucial for mastering complex studio shots​​​​.

Conclusion

Menghadapi the most difficult studio shot in photography adalah tantangan yang dapat mengasah keterampilan dan kreativitas seorang fotografer. Dengan mempelajari dan menerapkan teknik-teknik lanjutan, seperti pengendalian cahaya yang presisi, pemilihan fokus yang tepat, dan pemahaman mendalam tentang komposisi, fotografer dapat mengatasi hambatan ini dan menciptakan karya yang menonjol.

Setiap tantangan dalam fotografi studio adalah kesempatan untuk belajar dan berkembang. Dengan ketekunan dan pemahaman yang kuat tentang alat dan teknik yang tersedia, Anda akan dapat mengubah the most difficult studio shot in photography menjadi sebuah karya seni yang memukau dan memikat perhatian setiap orang yang melihatnya.

Categories: Photograph

How to Photograph a Painting for Flawless Results

How to Photograph a Painting is a crucial skill for artists, collectors, and anyone looking to archive or showcase their artwork digitally. Whether you’re preparing images for a portfolio, online sales, or simply documenting your creations, capturing the essence of a painting through photography requires attention to detail. Unlike general photography, this process involves specific techniques to ensure that colors, textures, and details are represented accurately. This guide will walk you through each step, from preparation to lighting, helping you achieve professional-quality images that truly reflect your artwork’s value.

How to Photograph a Painting: A Step-by-Step Guide

How to Photograph a Painting - A Step-by-Step Guide

Photographing a painting might seem straightforward, but achieving a perfect shot involves more than just pointing a camera. This step-by-step guide will help you navigate the nuances of this process, ensuring that every photograph you take showcases the best qualities of your artwork. In the sections that follow, we’ll cover essential preparations, lighting choices, and camera settings to help you master how to photograph a painting effectively.

Preparing Your Painting for Photography

Before you begin shooting, it’s crucial to prepare your painting. Proper preparation ensures that the artwork appears clean, vibrant, and free from any distractions that might detract from its presentation in the photograph.

Removing Glass and Frames

If your painting is framed or covered with glass, it’s best to remove these before photographing. Glass can cause unwanted reflections and glare, which can distort the colors and details of the painting. By removing the glass, you eliminate these issues, allowing the true quality of the artwork to shine through in the photograph.

Cleaning and Positioning the Painting

Dust and smudges can significantly affect the final image, so ensure your painting is clean. Use a soft, dry cloth to gently wipe the surface. Once cleaned, position the painting in a well-lit area, ideally against a neutral-colored wall. This neutral background helps in accurately capturing the colors of the painting without any interference from surrounding hues.

Choosing the Right Lighting

Lighting is arguably the most critical element in how to photograph a painting. The right lighting can make the difference between a flat, lifeless image and one that truly captures the depth and vibrancy of your artwork.

Natural Light vs. Artificial Light

Natural light is often preferred for its soft, even illumination, which is ideal for capturing the true colors of a painting. Position the artwork near a large window with diffused light for best results. However, artificial lighting offers more control and consistency. When using artificial lights, aim for daylight-balanced bulbs to mimic the natural light spectrum.

Setting Up Lighting Angles to Avoid Glare

Properly angling your lights is essential to avoid glare, which can obscure details and alter the appearance of colors. Position your lights at a 45-degree angle to the painting from either side. This setup helps distribute light evenly across the surface while minimizing the risk of glare.

Using Diffusers for Balanced Light

To achieve the softest and most balanced light, consider using diffusers. These can be as simple as placing a white sheet over your light source or investing in professional diffusing equipment. Diffusers help to soften the light, reducing harsh shadows and further preventing glare, ensuring that the photograph accurately reflects the painting’s details and colors.

Positioning Your Camera Correctly

Positioning your camera correctly is fundamental to achieving a high-quality photograph of your painting. A well-positioned camera ensures that the artwork is captured with accurate proportions, minimal distortion, and optimal focus, which is crucial when you are showcasing your work. The following steps will guide you in setting up your camera for the best possible results in how to photograph a painting.

Aligning the Camera with the Center of the Painting

Aligning your camera with the center of the painting is the first critical step in ensuring that the photograph is true to life. When your camera is perfectly centered, it reduces the chances of distortion, where the edges of the painting might appear skewed or the overall image might look stretched.

  • Centering the Lens: Make sure the camera lens is directly in line with the center of the painting. This alignment is essential to maintaining the painting’s proportions in the photograph. Use the grid lines on your camera or a level tool to assist in achieving perfect alignment​​​​.
  • Distance and Framing: Position the camera far enough from the painting so that the entire artwork fits within the frame with some margin. This distance helps in avoiding lens distortion, which can occur when the camera is too close​​.

Using a Tripod for Stability

Stability is key to capturing a sharp and clear image of your painting. Even the slightest hand movement can introduce blur, which can detract from the quality of the photograph. Using a tripod provides the stability needed for crisp images, especially in low-light conditions or when using slower shutter speeds.

  • Selecting a Tripod: Choose a sturdy tripod that can hold your camera steady without any wobble. A tripod with adjustable legs allows you to position the camera at the perfect height relative to the center of the painting​​​​.
  • Using a Remote Shutter or Timer: To further minimize camera shake, use a remote shutter release or set a timer. This method ensures that you don’t inadvertently move the camera while pressing the shutter button​​.

By carefully positioning your camera and ensuring stability with a tripod, you set the foundation for a professional-quality photograph that truly reflects the details and colors of your painting. These steps are essential components of mastering how to photograph a painting effectively.

Adjusting Camera Settings

Properly adjusting your camera settings is essential to capturing a high-quality photograph of a painting. These settings will help you accurately represent the colors, textures, and details of the artwork, making it look as true to life as possible. Below, we’ll discuss the most critical settings, including white balance, shutter speed, aperture, and the importance of using a remote shutter release when photographing paintings.

White Balance: Setting It Correctly

White balance is crucial in ensuring that the colors in your photograph match the actual colors of the painting. Incorrect white balance can lead to color casts, where the image appears too warm (yellow/orange) or too cool (blue).

  • Custom White Balance: For the most accurate color representation, it’s recommended to use a custom white balance setting. This involves taking a reference shot of a neutral grey card under the same lighting conditions as your painting, then setting your camera’s white balance based on that reference. This method ensures that your camera compensates correctly for the lighting in your environment​​.
  • Manual Adjustments: If your camera allows, manually adjust the white balance to match the type of lighting you’re using (e.g., daylight, tungsten, fluorescent). This adjustment can often be fine-tuned in post-processing but getting it close in-camera saves time later​​.

Optimizing Shutter Speed and Aperture

Shutter speed and aperture settings are critical to controlling the exposure and sharpness of your photograph.

  • Aperture (f-stop): For photographing paintings, a mid-range aperture (such as f/8 to f/11) is typically ideal. This range provides a good depth of field, ensuring that the entire surface of the painting is in sharp focus. It also helps in controlling the light entering the lens, contributing to a well-exposed image​​​​.
  • Shutter Speed: The appropriate shutter speed depends on your lighting conditions and whether you are using a tripod. With a tripod, you can use slower shutter speeds (e.g., 1/60th of a second or slower) to capture more light without risking blur from camera shake. If you are handholding the camera, a faster shutter speed (e.g., 1/125th of a second or faster) is advisable to avoid motion blur​​.

Using a Remote Shutter Release

To achieve the sharpest possible image, eliminating even the slightest camera movement is crucial. A remote shutter release is an invaluable tool for this purpose.

  • Preventing Camera Shake: Pressing the camera’s shutter button can cause slight vibrations, which are enough to blur the image, especially in low light or when using a slower shutter speed. A remote shutter release allows you to trigger the camera without physically touching it, thus preventing any potential movement​​​​.
  • Alternative Method: If you don’t have a remote shutter release, you can use your camera’s built-in timer. Set a 2-second or 10-second delay to allow any vibrations from pressing the shutter to dissipate before the camera actually takes the shot​​.

By carefully adjusting these camera settings, you can ensure that your photograph accurately captures the true essence of the painting, making your images as compelling as the artwork itself. These techniques are integral to mastering how to photograph a painting with precision and clarity.

Editing and Post-Processing

Once you’ve taken the photographs of your painting, the next critical step is editing and post-processing. This stage is essential for refining the image, ensuring that it truly represents the original artwork. Effective editing can enhance the colors, remove unwanted elements, and prepare the image for various uses, whether for online galleries, prints, or digital archives. Here’s how to approach how to photograph a painting with a focus on post-processing.

Color Correction Techniques

Color correction is one of the most important aspects of post-processing, especially when your goal is to match the photograph with the original painting as closely as possible.

  • Using a Grey Card: If you included a grey card in one of your photos, use it as a reference point for color correction. In your editing software, use the eyedropper tool on the grey card to set the correct white balance, which helps in achieving accurate colors across the entire image​​​​.
  • Adjusting Levels and Curves: Fine-tune the brightness and contrast using the levels or curves adjustment tools. These tools allow you to control the highlights, shadows, and mid-tones, ensuring that the photograph does not appear too dark or too washed out. The goal is to maintain the integrity of the colors and contrast as seen in the original artwork​​.
  • Selective Color Adjustments: Sometimes, specific colors in the photograph may need slight adjustments to better match the painting. Most photo editing software allows for selective color corrections, enabling you to tweak individual hues without affecting the entire image​​.

Cropping and Resizing for Online Use

Once color correction is complete, cropping and resizing your image for online use is the next step. Proper cropping can enhance the composition, while resizing ensures the image loads quickly on websites without sacrificing quality.

  • Cropping: Crop the image to remove any unnecessary background or to focus more closely on the painting itself. Ensure that the crop does not cut off any part of the artwork unless it’s an artistic choice. This step is crucial for creating a visually appealing image that draws attention to the painting​​.
  • Resizing: For online use, resize your image to a resolution that balances quality with loading speed. Typically, images for websites should be around 72 to 150 DPI (dots per inch) to ensure they load quickly while still looking sharp. However, if the image is intended for high-quality prints or archival purposes, maintain a resolution of 300 DPI​​​​.

Maintaining the Integrity of the Original Artwork

While editing can enhance the photograph, it’s essential to maintain the integrity of the original artwork. Over-editing can lead to a representation that no longer accurately reflects the painting.

  • Avoiding Over-Enhancement: Resist the temptation to overly enhance the colors or contrast beyond what is present in the actual painting. The goal is to represent the artwork authentically, so keep adjustments subtle and true to the original​​.
  • Saving and Archiving: When you finish editing, save your image in a high-quality format such as TIFF for archival purposes, as this format doesn’t lose quality over time. For online use, JPEG is acceptable, but ensure that the compression settings are high enough to preserve the image’s detail​​​​.

By carefully editing and post-processing your photograph, you ensure that the final image is a true and compelling representation of your painting. These steps are essential to mastering how to photograph a painting in a way that does justice to your artwork both online and in print.

Common Mistakes to Avoid

When learning how to photograph a painting, it’s easy to fall into common traps that can compromise the quality of your images. Understanding and avoiding these mistakes will help you produce photographs that accurately reflect the beauty and detail of your artwork.

Avoiding Parallax and Keystoning Issues

Parallax and keystoning are common issues that occur when your camera is not properly aligned with the painting, leading to distortion in the final image.

  • Parallax Distortion: This happens when the camera is not positioned directly in front of the painting, causing the artwork to appear skewed or distorted. To avoid this, ensure that the camera is aligned perpendicularly to the center of the painting. Use a level and grid lines in your camera’s viewfinder to help with precise alignment​​​​.
  • Keystoning: Keystoning occurs when the camera is tilted up or down, causing the painting to look like a trapezoid rather than a rectangle. This effect can be corrected by making sure the camera lens is parallel to the painting. If keystoning still occurs, post-processing tools in software like Photoshop can help correct the perspective, but it’s best to avoid it during the shooting process​​​​.

Ensuring Accurate Color Representation

Accurate color representation is vital for ensuring that the photograph of your painting is true to the original.

  • Lighting Consistency: Inconsistent lighting can cause color inaccuracies. Use the same type of lighting on both sides of the painting, and consider using a color checker or grey card to calibrate your camera’s white balance accurately​​​​.
  • Monitor Calibration: After shooting, ensure that your monitor is calibrated correctly when editing. A poorly calibrated monitor can lead to inaccurate color corrections, making the colors look different when viewed on other devices or printed​​​​.

Final Tips for Professional-Looking Photos

Even with the best techniques, a few final tips can elevate your photographs from good to professional quality. These tips will help ensure that your images are sharp, well-exposed, and ready for various uses.

Taking Multiple Shots and Bracketing

Taking multiple shots and using bracketing can significantly increase your chances of capturing the perfect image.

  • Multiple Shots: Always take several shots of your painting, adjusting the composition slightly each time. This approach allows you to select the best image later, ensuring that minor issues like camera shake or focus errors don’t ruin the photograph​​​​.
  • Bracketing: Bracketing involves taking several photos at different exposure levels (e.g., one at the correct exposure, one slightly underexposed, and one slightly overexposed). This technique ensures you capture the best possible exposure, which can be particularly helpful in post-processing to combine the best aspects of each shot​​.

Reviewing and Selecting the Best Image

After taking your shots, it’s crucial to carefully review and select the best image for editing and final use.

  • Reviewing: Use your computer’s large screen to zoom in on each photograph and check for sharpness, proper exposure, and accurate color. Pay special attention to the edges of the painting to ensure there’s no distortion or blurriness​​.
  • Selecting: Choose the image that best represents the painting, focusing on clarity, color accuracy, and composition. It’s often helpful to compare your top picks side by side to make the best choice​​​​.

By following these tips and avoiding common mistakes, you can master how to photograph a painting and create images that truly reflect the quality and beauty of your artwork.